Run Aggregation Pipelines
On this page
The Data Explorer is Atlas' built-in tool to view and interact with your data. You can use the Data Explorer to process your data by building aggregation pipelines. Aggregation pipelines transform your documents into aggregated results based on selected pipeline stages.
The Atlas aggregation pipeline builder is primarily designed for building pipelines, rather than executing them. The pipeline builder provides an easy way to export your pipeline to execute in a driver.
To access the Data Explorer:
- Click Databases in the top-left corner of Atlas.
- Click Browse Collections for your desired database deployment.
Or, if you are already viewing a specific database deployment, select the Collections tab.
Required Roles
To create and execute aggregation pipelines in the
Data Explorer, you must have been granted at least the
Project Data Access Read Only role.
To utilize the $out stage in your pipeline, you must
have been granted at least the
Project Data Access Read/Write role.
Access the Aggregation Pipeline Builder
Select the database for the collection.
The main panel and Namespaces on the left side list the collections in the datatabse.
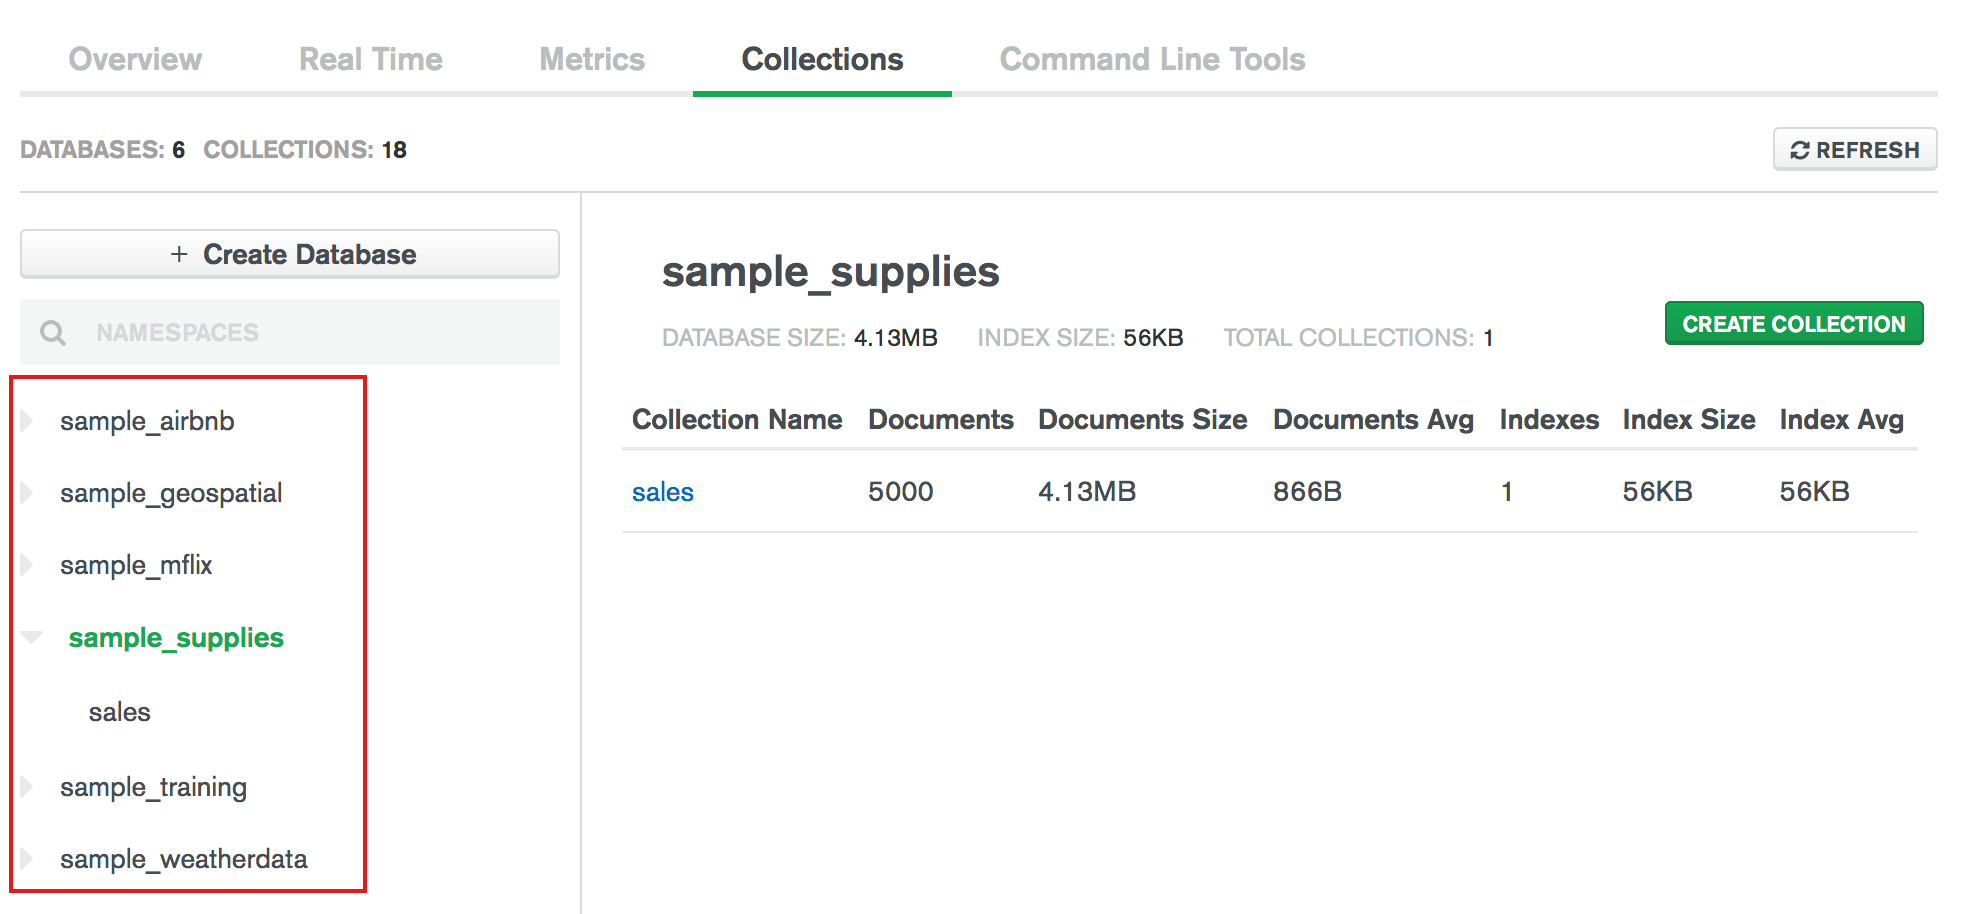
Select the collection on the left-hand side or in the main panel.
The main panel displays the Find, Indexes, and Aggregation views.
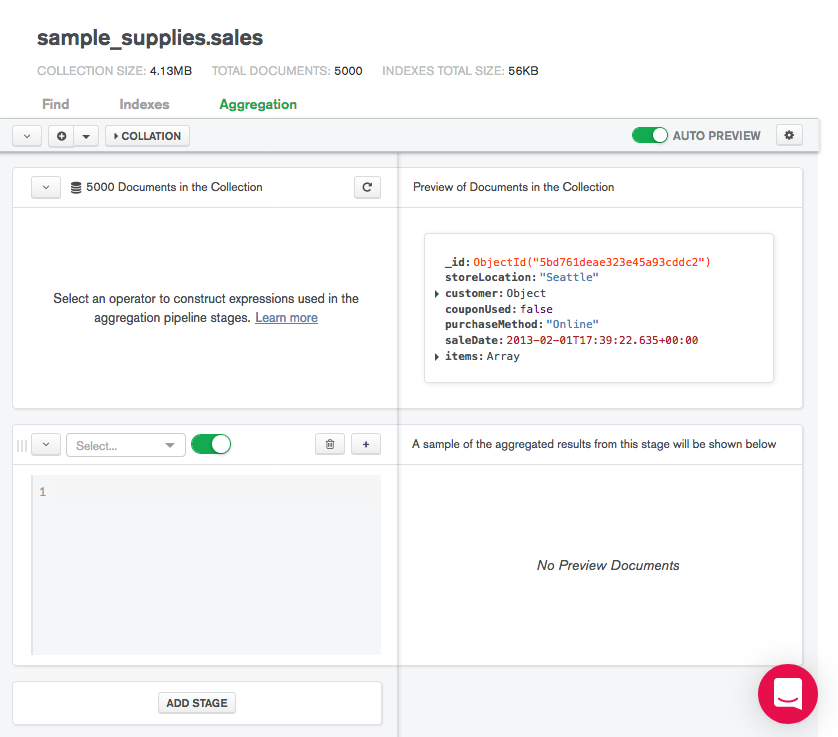
Select the Aggregation view.
When you first open the Aggregation view, Atlas displays an empty aggregation pipeline.
Create an Aggregation Pipeline
Select an aggregation stage.
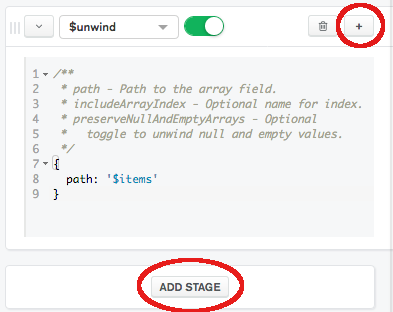
Select an aggregation stage from the Select dropdown in the bottom-left panel.
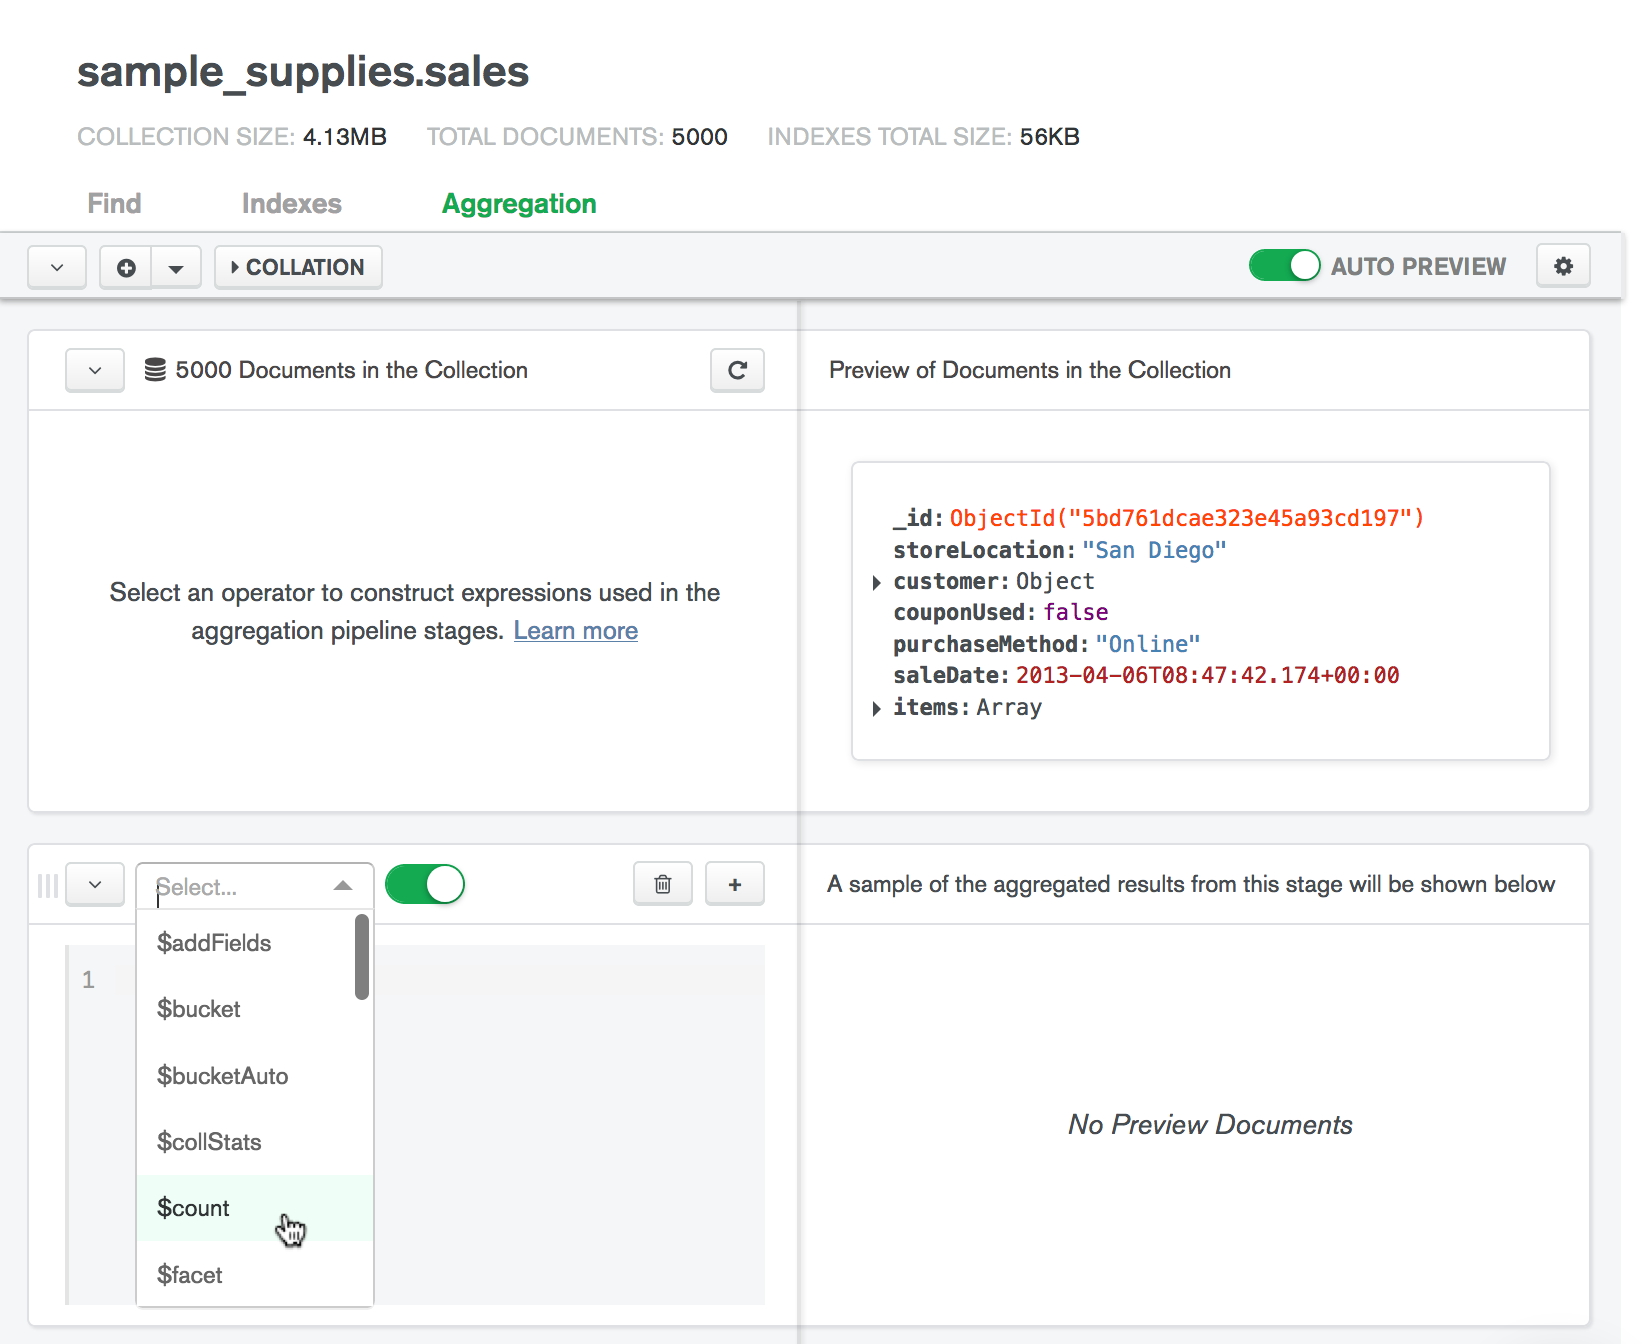
The toggle to the right of the dropdown dictates whether the stage is enabled.
Fill in your aggregation stage.
Fill in your stage with the appropriate values. If Comment Mode is enabled, the pipeline builder provides syntactic guidelines for your selected stage.
As you modify your stage, Atlas updates the preview documents on the right based on the results of the current stage.
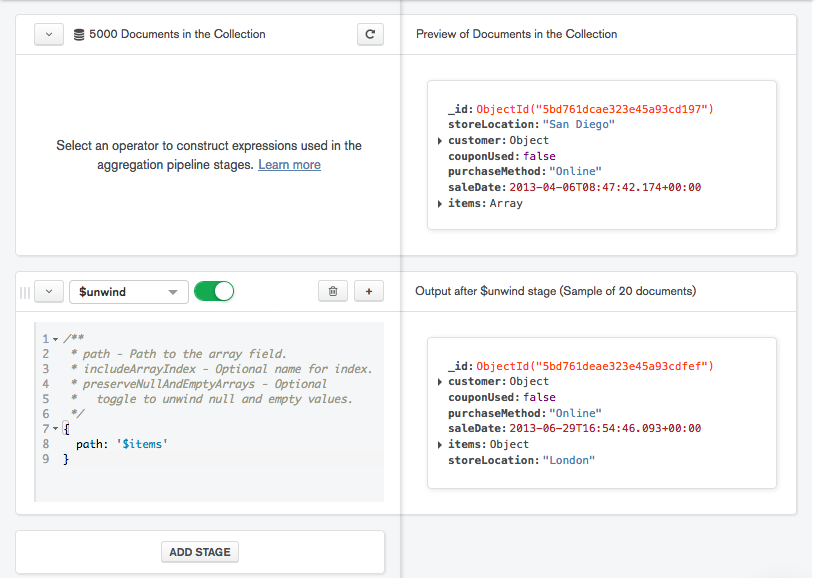
Add additional stages to your pipeline as desired.
There are two ways to add additional stages to your pipeline:
- Click the Add Stage button at the bottom of the pipeline to add a new stage at the end of your pipeline:
- Click the button on a stage to add a new stage directly after the stage where the button was clicked.
To delete a pipeline stage, click the icon on the desired stage.
Repeat steps 1 and 2 for each additional stage.
Collation
Use collation to specify language-specific rules for string comparison, such as rules for lettercase and accent marks.
To specify a collation document, click Collation at the top of the pipeline builder.
A collation document has the following fields:
{ locale: <string>, caseLevel: <boolean>, caseFirst: <string>, strength: <int>, numericOrdering: <boolean>, alternate: <string>, maxVariable: <string>, backwards: <boolean> }
The locale field is mandatory; all other collation fields are
optional. For descriptions of the fields, see
Collation Document.
Import an Aggregation Pipeline from Text
You can import aggregation pipelines from plain text into the pipeline builder to easily modify and verify your pipelines.
To import a pipeline from plain text:
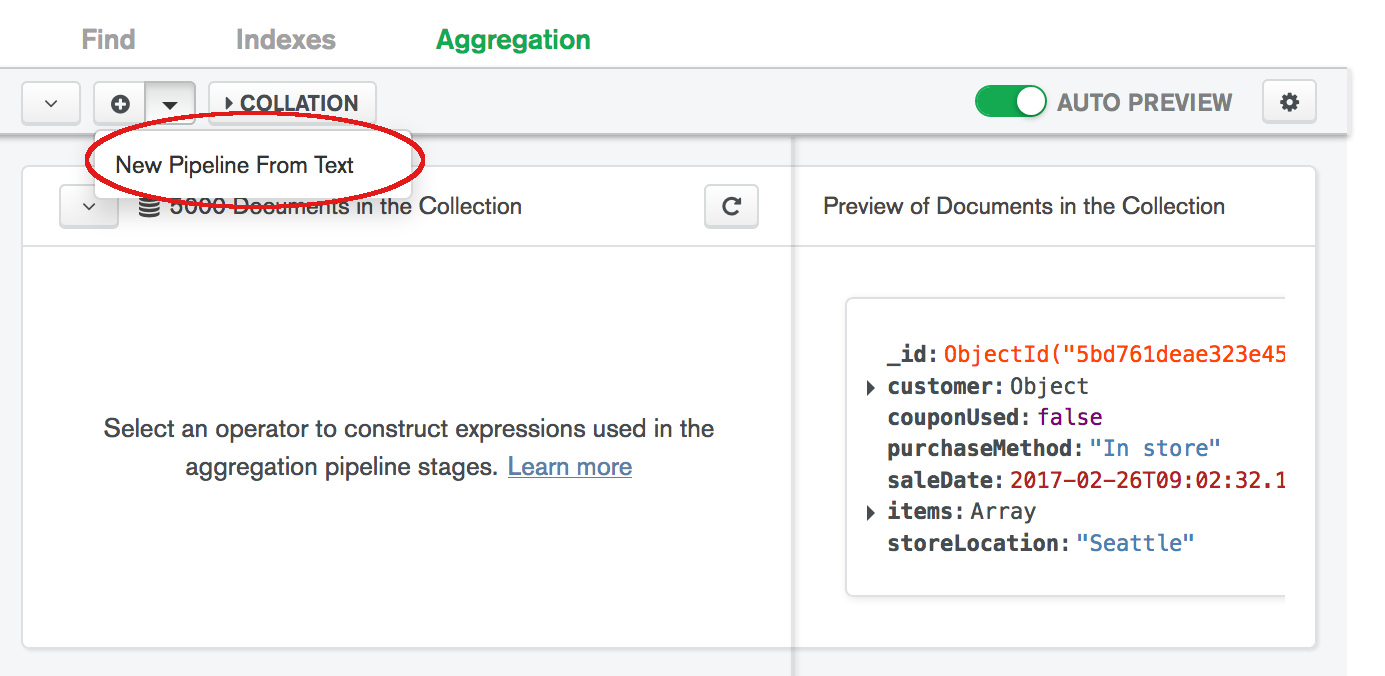
Open the New Pipeline from Text dialog.
- Click the arrow next to the plus icon at the top of the pipeline builder.
Click New Pipeline from Text.
Type or paste your pipeline in the dialog.
Your pipeline must match the syntax of the pipeline parameter of
the db.collection.aggregate()
method.
Click Create New.
Click Confirm in the ensuing dialog.
Reset Your Pipeline
To return your pipeline to the initial blank state, click the plus icon at the top of the pipeline builder.
Export an Aggregation Pipeline to Driver Language
You can use the aggregation pipeline builder to export your finished pipeline to one of the supported driver languages; Java, Node, C#, and Python 3. Use this feature to format and export pipelines for use in your applications.
To export your aggregation pipeline:
Construct an aggregation pipeline.
For instructions on creating an aggregation pipeline, see Create an Aggregation Pipeline.
Click Export to Language at the top of the pipeline builder.
Include import statements, if desired.
(Optional): Check the Include Import Statements option to include the required import statements for the language selected.
Click the Copy button.
Click the Copy button at the top-right of the pipeline to copy the pipeline for the selected language to your clipboard. You can now integrate your pipeline into your application.
Click Close to return to the aggregation pipeline builder.
Aggregation Pipeline Settings
To modify the aggregation pipeline builder settings:
Click the icon at the top-right of the pipeline builder.

Modify pipeline settings as desired.
You can modify the following settings:
Setting | Description | Default |
|---|---|---|
Comment Mode | When enabled, Atlas adds helper comments to each stage. Note Changing this setting only affects new stages and does not modify stages which have already been added to your pipeline. | On |
Number of Preview Documents | Number of documents to show in the preview for each stage. | 20 |