Connect from MySQL Workbench
Serverless instances are in preview and do not support this feature at this time. To learn more, see Serverless Instance Limitations.
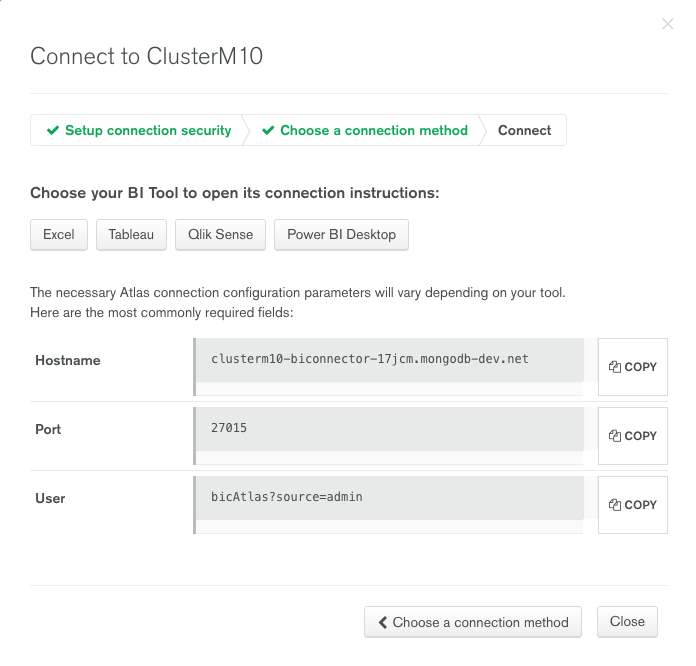
For M10+ clusters that have enabled the BI Connector for Atlas, the Connect dialog provides the details to connect via the BI Connector for Atlas.
Prerequisites
- Atlas cluster with BI Connector for Atlas enabled
MySQL Workbench 6.3 or later
NoteVersions of MySQL Workbench that are compatible with MySQL server version 5.7 are also compatible with the BI Connector for Atlas.
MongoDB recommends using MySQL Workbench version 6.3 to guarantee compatibility.
Procedure
The following tutorial outlines the steps to connect using MySQL Workbench 6.3. Atlas supports both the Community and Commercial Editions.
Start MySQL Workbench.
Start the MySQL Workbench 6.3.
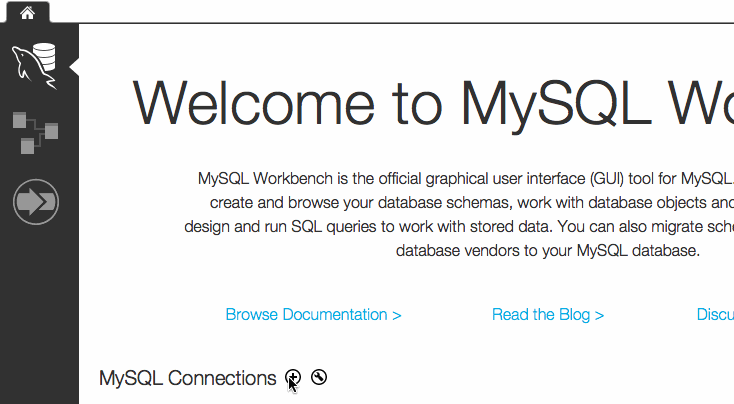
Create a New MySQL Connection.
From the Welcome page, click on the plus sign (
+):Alternatively, you can create a new connection from the Manage Connections ... screen.
- Enter the name for your connection.
Configure the parameters for the connection. In the Parameters section, update the following fields:
Field NameDescriptionHostnameEnter the Hostname specified in the Atlas connect dialog.PortEnter the Port specified in the Atlas connect dialog.UsernameEnter either the user specified in the Atlas connect dialog or a different database user for the cluster.
The user is specified in the format:
<username>?source=<database-name> where the
<database-name>is the authentication database for the user.PasswordStore the password in the keychain.Default SchemaOptional. The name of a database in the cluster to connect.
Configure the SSL settings for the connection. In the SSL section, update the following field:
Field NameDescriptionUse SSLSelect If available.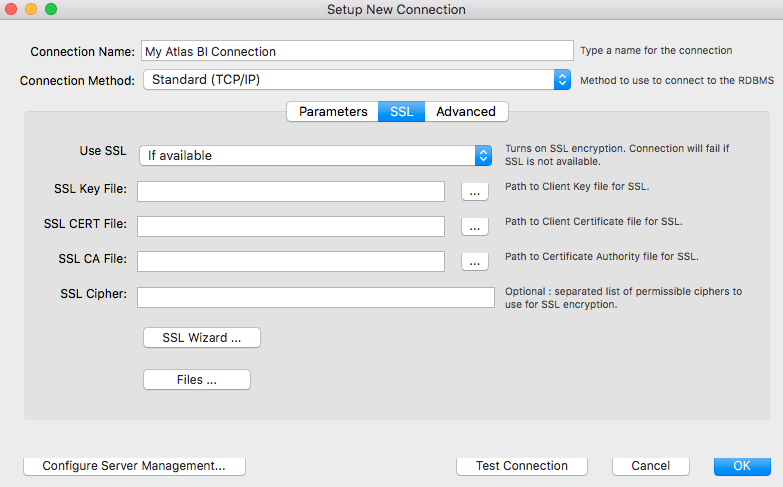
Configure the advanced settings for the connection. In the Advanced section, update the following field:
Field NameDescriptionEnable Cleartext Authentication PluginSelect.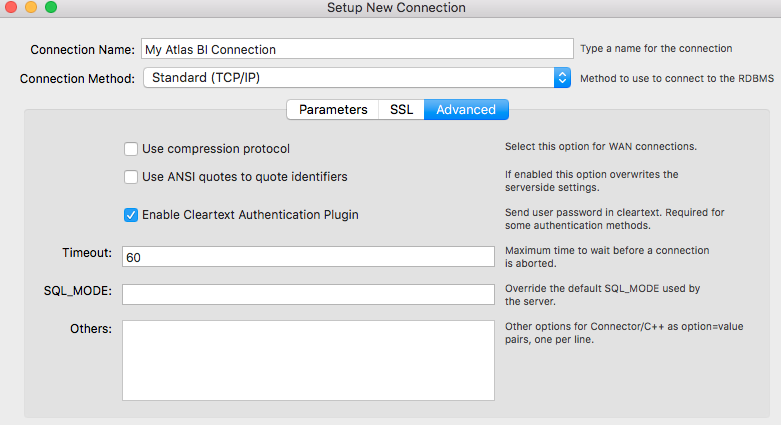
Click the Test Connection to test the connection.
If the connection is successful, click OK and Close the Connection setup screen and return to the Welcome page.
If the connection fails, check the settings, including the MongoDB database user credentials and the IP access list.
Connect.
From the Welcome page, double-click on the newly created connection to connect and open the SQL Editor.
Additional Reference
For more information on the MongoDB Connector for Business Intelligence, see MongoDB Connector for BI Manual.