Quick Start for Unity - .NET SDK
On this page
- Prerequisites
- Install
- Add NPM as a Scoped Registry
- Add Realm to the Project Manifest
- Verify the Realm Dependency and Check for Updates
- Download the Latest Realm .NET SDK Release
- Add the Tarball to Your Projects Package Manager
- Import Realm
- Using Realm in Your Unity Project
- Managed Code Stripping
- Using Realm While the Application is Quitting
- Additional Examples
This page contains information on how to install and integrate Realm into your Unity project.
Prerequisites
Unity 2020.3.12f1 (LTS)
Note
The Realm .NET SDK may be compatible
with other versions of Unity, but 2020.3.12f1 (LTS) is the version that
the Realm team uses for testing and development. We recommend
using this version to ensure your project works with Realm and
that the install steps match the steps below since Unity's UI often changes
between versions.
Install
Realm provides various ways to install the Realm .NET SDK for use with Unity. Experienced Unity developers may find installing Realm manually with a tarball to be intuitive. However, we recommend installing the Realm .NET SDK via npm since it provides notifications of version updates through Unity's package manager.
Add NPM as a Scoped Registry
Before you can download and use Realm within your Unity project, you must add NPM as a scoped registry. Adding NPM as a scoped registry configures Unity to communicate with NPM, allowing you to install packages, such as Realm.
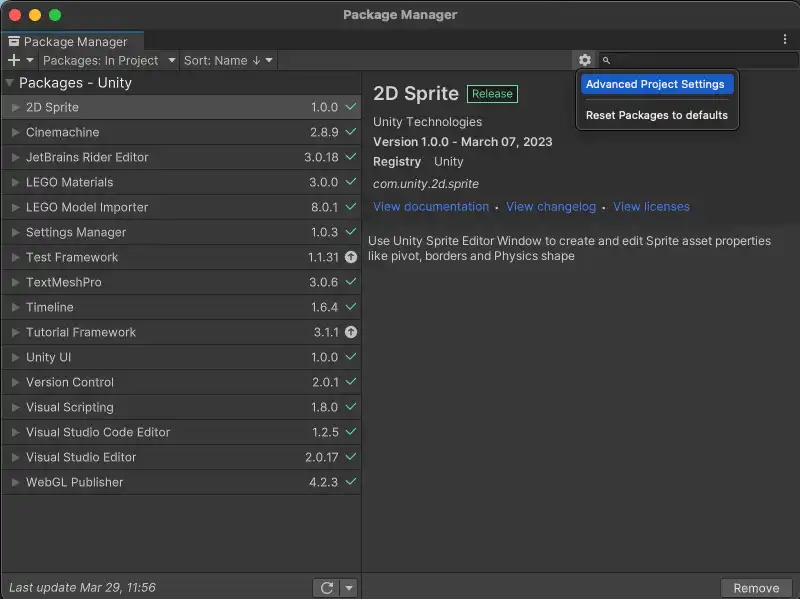
Open the Unity package manager by clicking the Window tab on the top of the Unity menu. Click Package Manager from the Window dropdown. Then, click the gear icon on the right-hand corner. Select the Advanced Project Settings option from the dropdown.

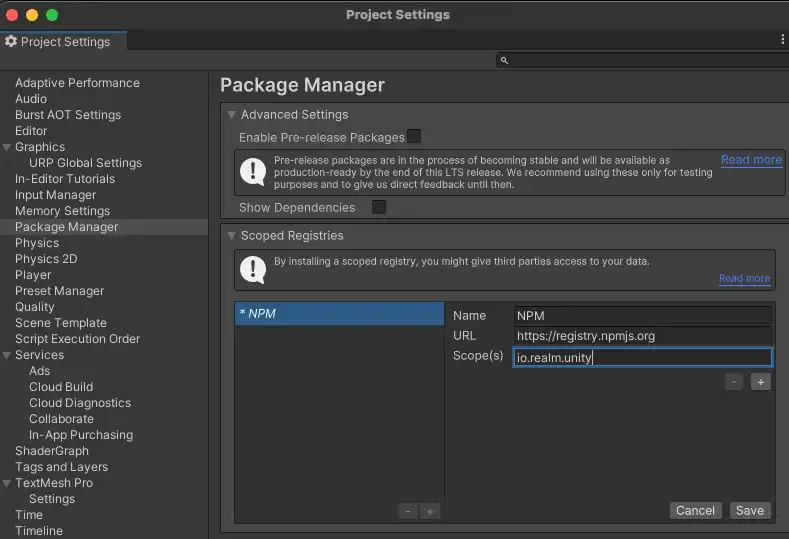
Fill out the scoped registry form with the details below and click the save button.
name = NPM URL = https://registry.npmjs.org Scope(s) = io.realm.unity

Add Realm to the Project Manifest
Now that Unity can install the Realm .NET SDK from NPM, you need to add Realm as a dependency in your project's manifest file. Open "Packages/manifest.json" file in Visual Studio or another text editor. At the bottom of the dependency's object, add the field, "io.realm.unity" and its value, the Realm .NET version number you want to use in quotes.
"io.realm.unity": "<version-number>"
Remember to replace the <version-number> above with the actual version
number. You can find the latest release version at the
realm-dotnet GitHub repo.
Your full manifest file should look something like the following:
{ "dependencies": { ... "io.realm.unity": "10.21.0" }, "scopedRegistries": [ { "name": "NPM", "url": "https://registry.npmjs.org/", "scopes": [ "io.realm.unity" ] } ] }
When you save this file, Unity downloads the specified version of the Realm .NET SDK package from the NPM registry.
Verify the Realm Dependency and Check for Updates
To verify that the Realm package has been downloaded from NPM, open your Unity package manager by clicking the Window tab on the top of the Unity menu. Click Package Manager from the Window dropdown. You should see Realm on the "Packages: In Project" tab.

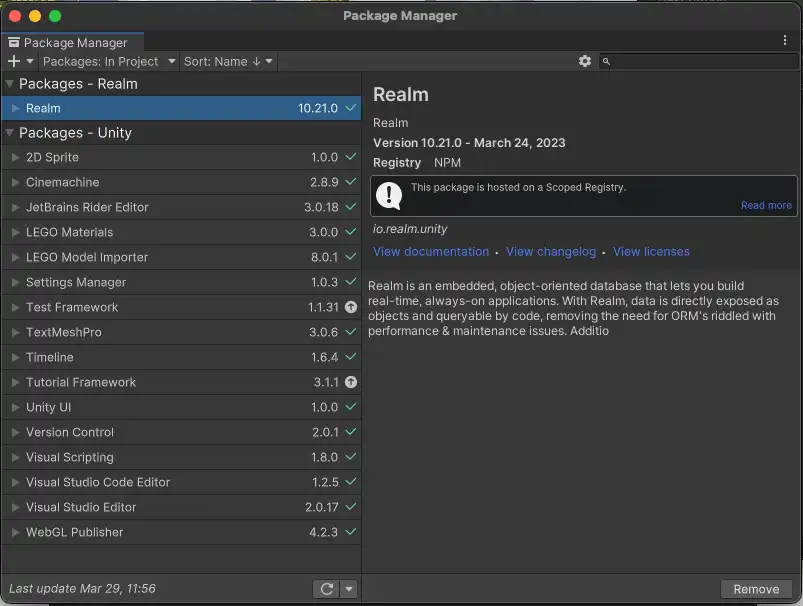
If you see a green check icon next to the version number of the Realm package, that means your package is up-to-date. However, if you see the up arrow icon, a new version of the package is available. Clicking it gives you the option to upgrade to the latest release.
Download the Latest Realm .NET SDK Release
Before you begin using Realm within your Unity project, you must download the Realm .NET SDK.
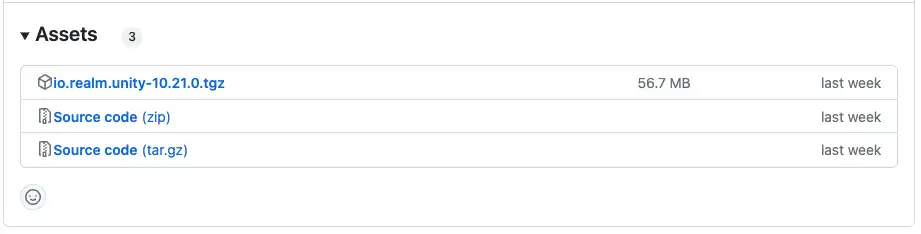
Navigate to the realm-dotnet repository releases page, and scroll down to the release you want to use in your project. If you are unsure of which release to use, you can use the one labeled "latest release" on the left row.


Scroll down to the "Assets" dropdown of the release and click the link labeled "io.realm.unity-<version-number>.tgz" to download the SDK.

Add the Tarball to Your Projects Package Manager
Move your downloaded Realm .NET SDK tarball inside of your project. You can do this by dragging and dropping the file into your project's folder. Copying the tarball to your project folder and committing it to version control ensures other developers working on the project can just clone the repository and build without manually downloading the Realm dependency.
Next, you must load the tarball into your project using the Unity package manager.
To open the package manager, click the Window tab on the top of the Unity menu. Click Package Manager from the Window dropdown. Once the package manager model opens, click the + icon in the top left corner of the model. Select the Add package from tarball... option.


Select your "io.realm.unity-bundled-<version-number>.tgz" file to begin importing your project.
Import Realm
Create a C# script or use a C# script you have already created. Open that script in Visual Studio or another text editor and add the following line to import your Realm package:
using Realms;
Using Realm in Your Unity Project
When developing with Realm .NET SDK, the API methods are the same regardless of whether you use Unity or another platform. However, since Unity has some scripting restrictions, you should keep the following additional considerations in mind when developing your project:
Managed Code Stripping
Unity performs managed code stripping,
discarding any unused code from a build to reduce binary size. This may lead to issues when
deserializing BSON into C# classes. For platforms
that use IL2CPP, such as iOS,
managed code stripping is enabled by default. When working with BSON, use
the [Preserve] attribute
to prevent managed code stripping on types properties that are only populated by
the serializer. Since those properties use
reflection,
Unity cannot statically infer that the property setter is used. This means that
unless you apply the [Preserve] attribute, Unity will strip those properties
away. For examples of when you may perform BSON deserialization, check out the
Query MongoDB and
Call a Function documentation.
Using Realm While the Application is Quitting
The Realm .NET SDK cannot be accessed within the AppDomain.DomainUnload Event or the Application.quitting event. This means you cannot write data to a Realm while the player application is quitting. If you need to store some data just before the app exits, consider using the Application.wantsToQuit event instead.
Note
Known Issue When Developing With Unity on Windows
On Windows, if you are using Device Sync, your project may crash when running multiple instances of your project since multiple processes are attempting to access the same synced realm. If you are using a local realm, you are able to run multiple instances of your project without crashes.
Additional Examples
The Realm community has created many projects that demonstrate the usage of the Realm .NET SDK. Check out the examples below that demonstrate the usage of the Realm .NET SDK with Unity!
Note
The MongoDB Documentation team does not directly maintain these examples.