Create a Global Cluster
On this page
This section covers enabling Global Writes on an Atlas cluster.
Considerations
Before creating a Global Cluster, review Global Clusters Overview and Global Clusters Sharding Reference.
You can enable Global Writes in Atlas when you deploy an
M30or greater sharded cluster.After you deploy the cluster, you can't convert a Global Cluster to a standard sharded cluster.
Due to sharding requirements, you can't load sample data onto a Global Cluster.
If this is the first dedicated paid cluster for the selected region or regions and you plan on creating one or more VPC peering connections, review VPC Peering Connections before continuing.
Procedure
Navigate to the Database Deployments page for your project.
If it is not already displayed, select the organization that contains your desired project from the Organizations menu in the navigation bar.
If it is not already displayed, select your desired project from the Projects menu in the navigation bar.
If the Database Deployments page is not already displayed, click Databases in the sidebar.
Open the Create New Cluster dialog box.
Click Create to display the Create New Cluster dialog box.
If this is your first database deployment:
Click Build a Database.
Click Advanced Configuration Options in the lower right corner.
Enable Global Writes for your cluster.
In the Create New Cluster dialog box, select the Dedicated cluster type. For more information, see Create a Cluster.
Click Global Cluster Configuration to expand the section.
Toggle Enable Global Writes (M30 and Up) to On to display the Global Cluster configuration.
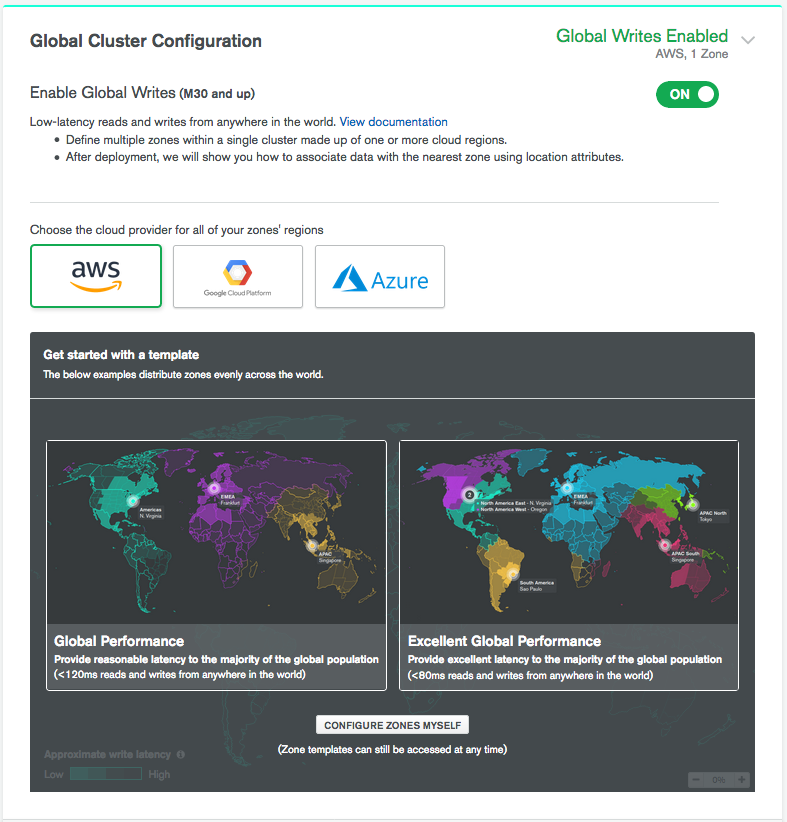
Select your preferred cloud provider.
Note
Each cloud provider has a selection of global regions to which Atlas can deploy a zone. The choice of cloud provider may support or constrict your ability to deploy a zone to specific geographic locations. The configuration options available and the cost for running the cluster may also vary depending on cloud provider selection.
Configure your Global Cluster Zones.
Atlas provides three options for configuring your Global Cluster zones:
Configure Global Writes Zones Using a Template
Configure a Global Writes Single Region Zone
Configure a Global Writes Multi Region Zone
Select the appropriate tab based on how you would like to configure your Global Cluster zones.
Select the Cluster Tier.
To use Global Clusters, you must select a cluster tier
that is M30 or larger.
The selected tier dictates the memory, storage, and IOPS specification for each data-bearing server in the cluster.
For more information on how to select an appropriate cluster tier and storage settings for your workload, see Select Cluster Tier and Customize Cluster Storage.
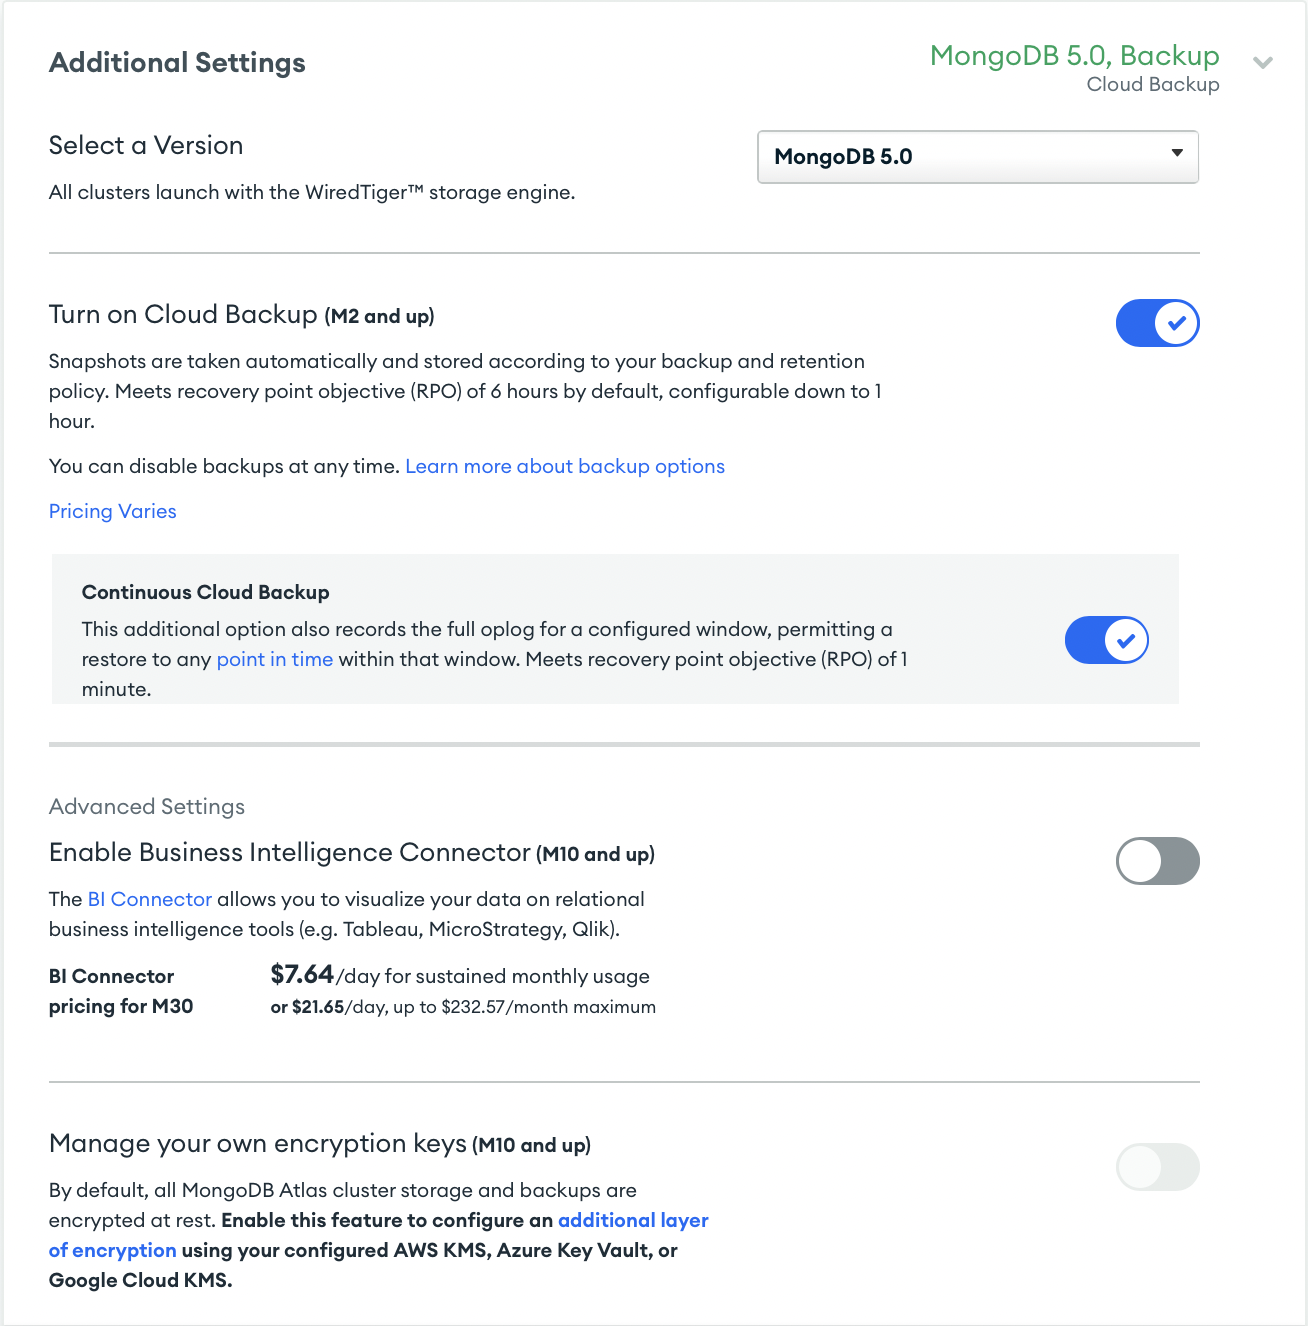
Select any Additional Settings.
From the Additional Settings section for Global Clusters, you can:
Enter the Cluster Name.
This is the cluster name as it appears in Atlas. You can't change the cluster name once Atlas deploys the cluster.
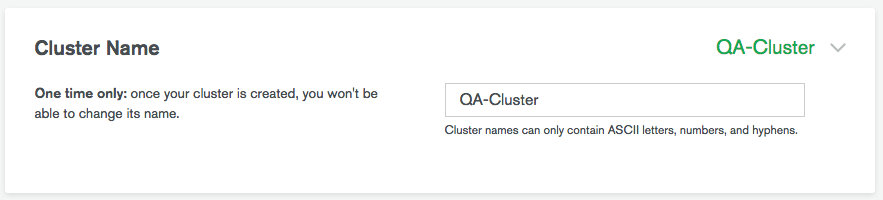
Cluster names can't exceed 64 characters in length.
Important
Atlas truncates the cluster name to 23 characters in its internal interactions. In practice, this means:
Cluster names shorter than 23 characters can't end with hyphen or dash (
-).Cluster names 23 characters or longer can't use a hyphen or dash (
-) as its 23rd character.The first 23 characters in a cluster name must be unique within a project.
Deploy your cluster.
Click Create New Deployment below the form to deploy your cluster.
Important
Each Atlas project supports up to 25 database deployments. Please contact Atlas support for questions or assistance regarding the database deployment limit. To contact support, select Support from the left-hand navigation bar of the Atlas UI.
Shard a global collection.
After deployment, you must configure shard keys for the cluster. To learn how to shard a collection for global writes, see Shard a Global Collection.